## Check-System-Usage   [](https://github.com/psf/black)  ### About A Python3 script to automate the email sending process ### Setup * Install Python3 for Windows from [here](https://python.org). * Open Windows Command Prompt * Clone the repository ```bash git clone https://github.com/GDSC-RCCIIT/General-Purpose-Scripts.git ``` * Navigate inside the ```scripts\Email-Sender``` directory. ```bash cd General-Purpose-Scripts\scripts\Email-Sender ``` * Run using Python ```bash python system-usage.py ``` Note: Make sure you have enabled the "Less Secure Apps" from Google account security to send emails using that script. ### Steps to Allow Less Secure Apps * Visit: https://myaccount.google.com/intro/security * Disable 2-Step Verification if enabled (See the image below). 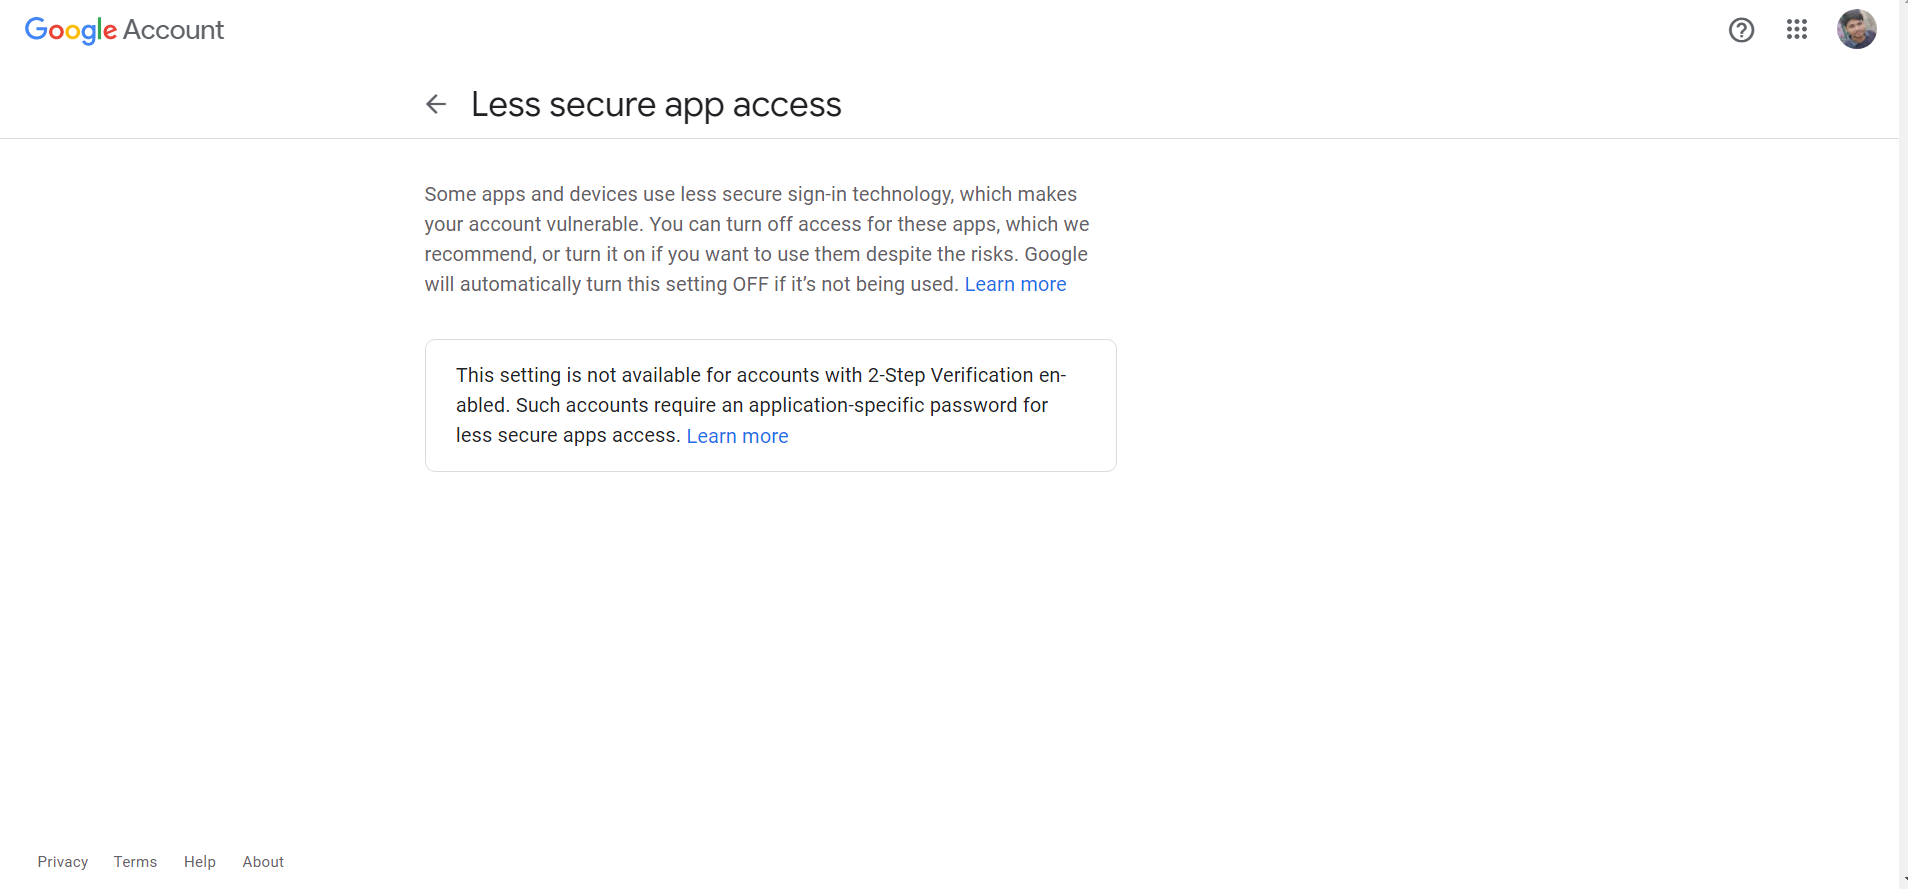 * Then Turn On Less Secure Apps (See the image below) 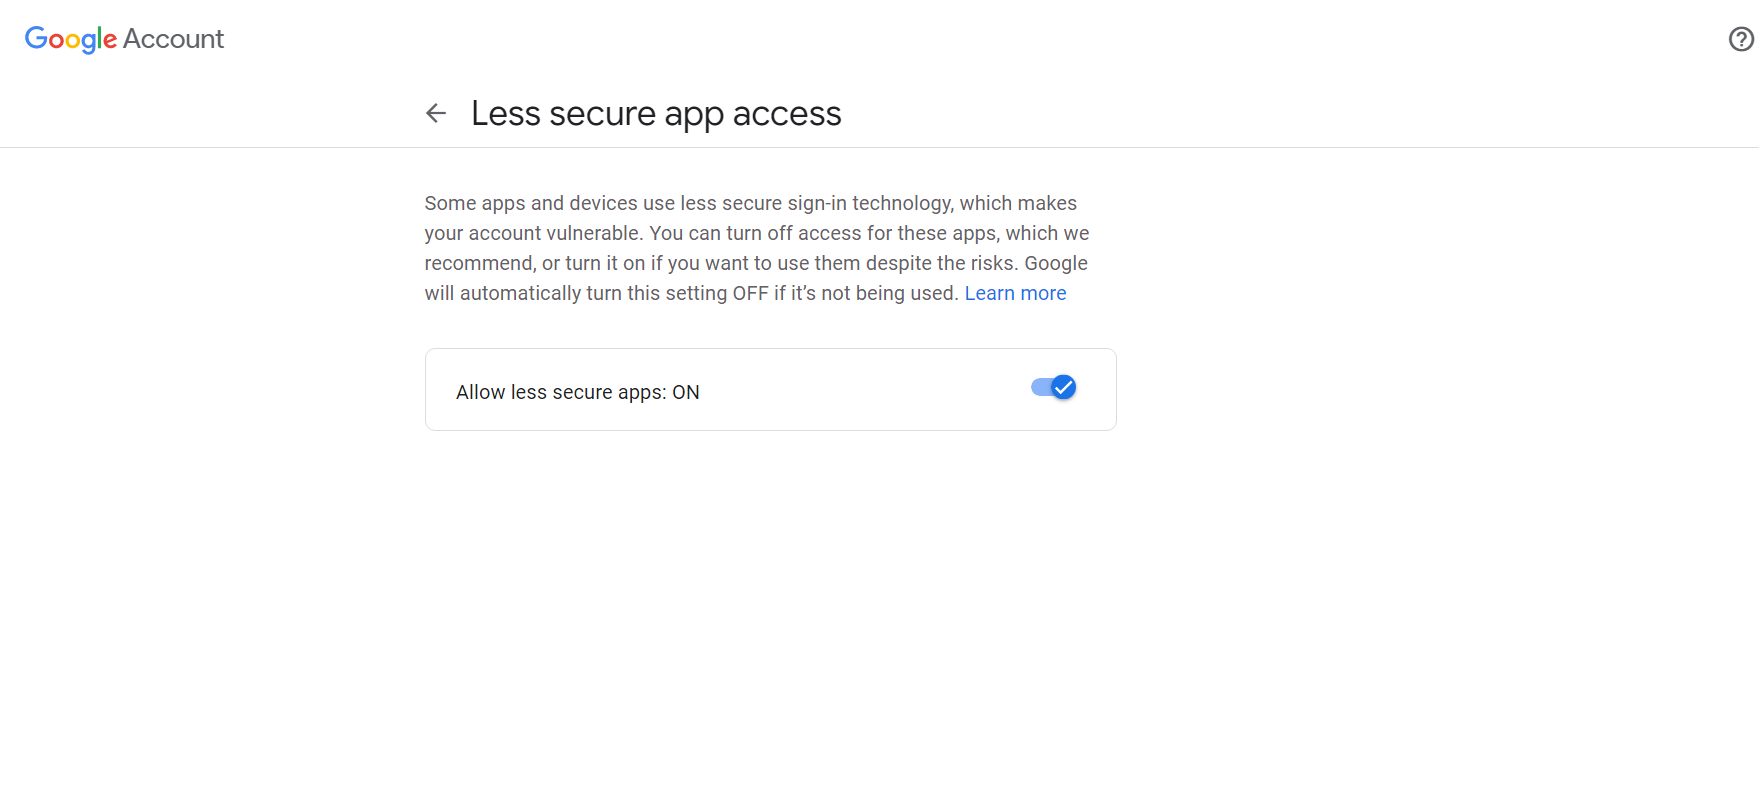 * Now you are good to go.